
我这里将我如何在linux服务器中安装docker以及在容器中配置C++环境的步骤以及遇到的一些问题总结如下。
安装的工具和软件:
- docker
- gcc/g++工具包
- vim
- wget
- git
- boost
- cmake
- jsoncpp
- grpc
参考:
C++ Docker配置 C++ boost 开发环境_哔哩哔哩_bilibili
Linux系统安装 docker 容器及部署项目_linux docker-CSDN博客
1. 安装docker
更新软件列表
1 | sudo apt update |
安装依赖项以允许使用 HTTPS 通过 APT 获取 Docker
1 | sudo apt install -y apt-transport-https ca-certificates curl software-properties-common |
添加 Docker 的官方 GPG 密钥
1 | curl -fsSL https://download.docker.com/linux/ubuntu/gpg | sudo gpg --dearmor -o /usr/share/keyrings/docker-archive-keyring.gpg |
将 Docker APT 软件仓库添加到系统中
1 | echo "deb [arch=amd64 signed-by=/usr/share/keyrings/docker-archive-keyring.gpg] https://download.docker.com/linux/ubuntu $(lsb_release -cs) stable" | sudo tee /etc/apt/sources.list.d/docker.list > /dev/null |
更新软件包列表,并安装 Docker CE
1 | sudo apt update |
验证 Docker 是否已成功安装
1 | sudo docker run hello-world |
我这里在前面几步都成功了,但到最后一步的时候提示我连接超时,如下

我尝试了国内很多镜像源,比如阿里云的镜像源,但仍然会有这个问题
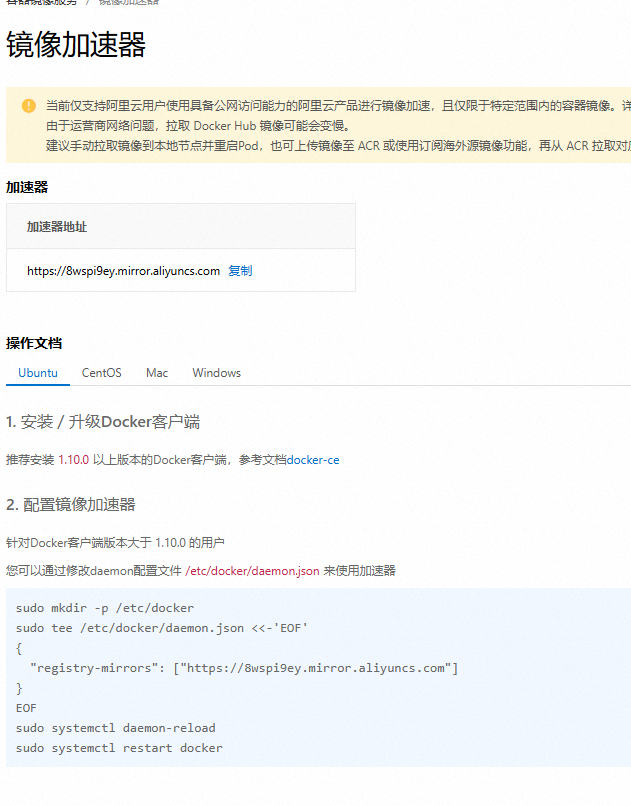
最后找到解决办法:
参考:
https://link.zhihu.com/?target=https%3A//blog.csdn.net/Liiiiiiiiiii19/article/details/142438122
首先打开daemon.json文件:
1 | sudo nano /etc/docker/daemon.json |
在该文件中写入
1 | { |
ctrl+x保存,点y+enter退出。
重载系统守护进程并重启 Docker:
1 | sudo systemctl daemon-reload |
重新拉取docker hello world
1 | sudo docker pull hello-world |
启动容器:
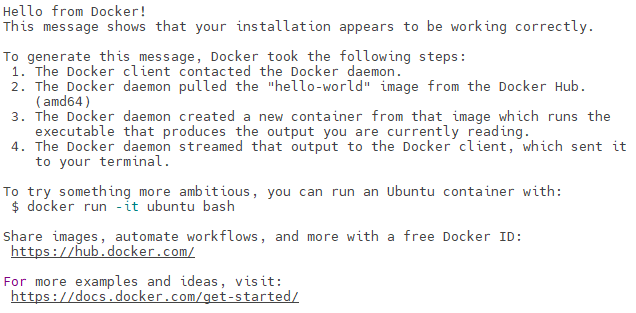
1 | sudo docker run hello-world |
如果输出“Hello from Docker!”,那么容器拉取运行成功
2. 配置C++环境
该过程参考博主恋恋风辰:
1)启动ubuntu:22.04容器
1 | sudo docker run -itd --name cppubuntu ubuntu:22.04 |
itd:
ubuntu:22.04: 乌班图版本为22.04

出现这一段内容代表镜像拉取成功,输入‘sudo docker ps’查看容器

进入容器,,复制容器id,我这里是:‘5d2a7e6c07cb’,然后输入
1 | sudo docker exec -it 5d2a7e6c07cb /bin/bash |
以bash脚本的方式进入容器,查看该系统是什么样的
进入以后,用户名发生了改变,我之前的用户名是:‘yuanwenzheng@nwpu232:’,但进入容器后是:

2)配置编译环境G++
当前目录下创建一个test子目录
1 | mkdir ./test |
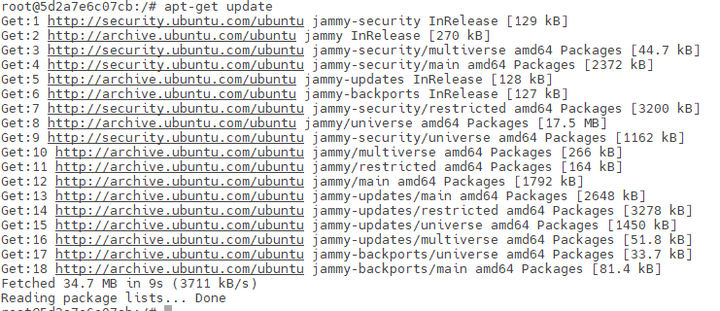
容器内更新源,安装最新的软件包
1 | apt-get update |
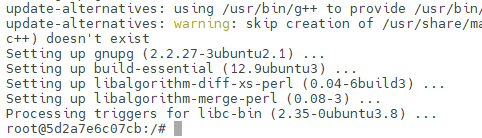
配置C++编译环境,容器内安装gcc/g++工具包
1 | apt install build-essential |
然后点y确定,安装成功:
测试安装的版本是否支持C++17
1 | echo "#include <iostream>" > test.cpp |
将‘#include
1 | mv ./test.cpp ./test |
并cd至test文件中
1 | cd ./test/ |
文件中只有test.cpp一个文件

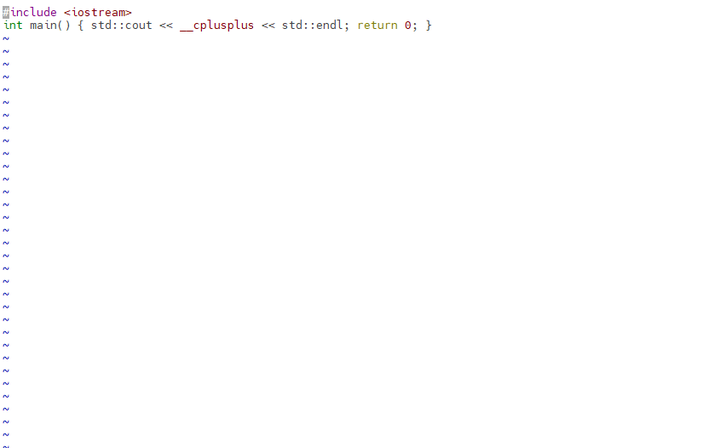
然后将main函数加入至test.cpp文件中,将c++版本输出
1 | echo "int main() { std::cout << __cplusplus << std::endl; return 0; }" >> test.cpp |
使用g++编译test.cpp文件,c++版本为17,输入test执行文件
1 | g++ -std=c++17 test.cpp -o test |
这里执行test
1 | ./test |

这里输出‘201703’,版本输出成功,因为C++17是2017年3月制定的标准。
3)安装软件
安装vim
1 | apt install vim |
测试vim,输入
1 | vim ./test.cpp |
vim安装成功
如何解决vim乱码?(中文不能正常显示)
打开用户目录下的vim配置文件
1 | vim ~/.vimrc |
输入
1 | set termencoding=utf-8 |
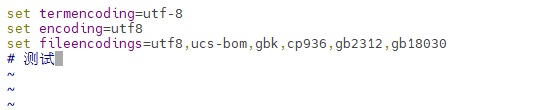
如图,中文显示正常
安装wget
1 | apt install wget |
安装boost
获取boost库的源码包,我这里的boost版本是1.86.0
1 | wget https://archives.boost.io/release/1.86.0/source/boost_1_86_0.tar.gz |
如果下载太慢,可以将文件下载好上传至宿主机,然后在宿主机输入,不能在容器内输入
1 | sudo docker cp /home/ubuntu/boost_1_86_0.tar.gz cppubuntu:/test |
这里docker容器从路径“/home/ubuntu/boost_1_86_0.tar.gz”copy至“cppubuntu:/test”
安装boost需要的一些库
1 | apt-get install python3-dev autotools-dev libicu-dev build-essential libbz2-dev libboost-all-dev |
因为 python-dev 包已经被废弃,可以使用 python-dev-is-python3 或 python2-dev 作为替代方案,自己选择具体的python版本进行安装,我这里选择python3.
解压boost库
首先,确保你在当前工作目录下已下载boost库压缩包

然后输入:
1 | tar zxvf boost_1_86_0.tar.gz |
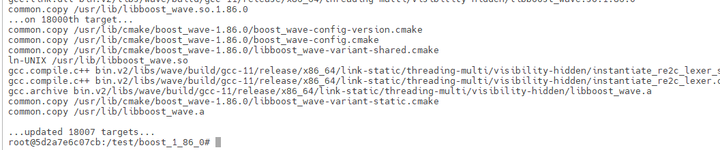
然后,进入boost文件中,配置向导,预先设置安装目录为usr,并安装
1 | cd ./boost_1_86_0 |
安装完成后显示
安装git
1 | apt install git |
安装成功后进行git初始化
1 | git config --global user.name "Qbb" |
初始化用户名和邮箱,并在当前目录下设置初始化一个新的Git仓库,输入下面代码验证初始化是否成功
1 | git config --global user.name |
安装cmke
1 | wget https://github.com/Kitware/CMake/releases/download/v3.27.0/cmake-3.27.0.tar.gz |
如果安装太慢,可以在下载好上传至宿主机,然后再宿主机内输入
1 | sudo docker cp /mnt/datab/home/yuanwenzheng/C++/cmake-3.27.0.tar.gz cppubuntu:/test |
安装必要的ssl库
1 | apt install libssl-dev |
解压cmake压缩包
1 | tar -zxvf cmake-3.27.0.tar.gz |
解压后进入‘cmake-3.27.0’文件夹内
1 | ./cmake-3.27.0/ |
设置引导程序
1 | ./bootstrap |
测试
1 | cmake --version |

出现该界面说明cmake安装成功
安装jsoncpp
1)直接安装
1 | apt install libjsoncpp-dev |
2)源码安装
首先,从github上下载jsoncpp的源代码(tar.gz格式):
然后,在宿主机上将源代码复制到容器中
1 | sudo docker cp /mnt/datab/home/yuanwenzheng/C++/jsoncpp-1.9.6.tar.gz ServerUbuntu:/test |
解压
1 | tar zxvf ./jsoncpp-1.9.6.tar.gz |
进入jsoncpp-1.9.6文件夹内
1 | cd ./jsoncpp-1.9.6/ |
测试jsoncpp库
1 | # 至code文件内 |
复制以下内容
1 |
|
查看jsontest.cpp文件中的的内容
1 | cat ./jsontest.cpp |
编译jsontest.cpp测试文件
1)使用g++进行编译
1 | g++ jsontest.cpp -o jsontest -ljsoncpp |
- jsontest.cpp: 源代码文件名。
- -o jsontest: 指定输出文件名为 jsontest。
- -ljsoncpp: 链接 jsoncpp 库
2)写CMakeLists.txt文件
首先,创建CMakeLists.txt文件
1 | vim ./CMakeLists.txt |
然后,写入以下内容至该文件
1 | cmake_minimum_required(VERSION 3.12) |
创建build文件夹,进入build,执行cmake,make生成可执行文件
1 | # 创建build文件夹 |
执行可执行文件
1 | ./jsontest |
输出以下内容表示jsoncpp库安装成功

安装grpc
克隆grpc指定分支
1 | git clone -b v1.34.0 https://gitee.com/mirrors/grpc-framework.git grpc |
进入grpc文件并更新子模块
1 | cd grpc |
会使用vpn可以加速这个过程,如果不会使用那么在执行‘git submodule update –init’时连接可能会失败。解决办法可参考:
修改.gitmodules
1 | vim ./.gitmodules |
输入”:%d”删除所有内容,粘贴以下内容
1 | [submodule "third_party/zlib"] |
然后再执行更新子模块命令
1 | git submodule update --init |
然后就是相同的步骤,创建build执行cmake
1 | # 创建build文件夹 |
“cmake -DCMAKE_INSTALL_PREFIX=/usr/local ..”和“cmake ../”的区别在于:前者明确地指定了安装路径,即使系统的默认值不是 /usr/local,也会使用这个路径;而后者使用默认的安装路径,通常是 /usr/local,但如果默认值被更改或不同环境下有不同的默认值,那么它会依据当前系统的默认配置。
执行cmake
1 | # 执行make进行编译 |
“make -j8”和“make”的区别在于:前者使用八个并行任务,可以提高编译速度(适合多核 CPU);后者顺序编译,只使用一个任务,速度较慢。
我在编译过程遇到两个错误:
1)编译abseil-cpp 的 graphcycles.cc 文件时遇到的错误表明,std::numeric_limits 没有被识别。我这里在graphcycles.cc添加了头文件
1 | cd /test/code/grpc/third_party/abseil-cpp/absl/synchronization/internal/ |
2)译 abseil-cpp 的 failure_signal_handler.cc 文件时遇到的错误表明 std::max 函数无法处理不同类型的参数(long int 和 int)。我这里在failure_signal_handler.cc 文件内,修改了138行代码:
1 | cd /test/code/grpc/third_party/abseil-cpp/absl/debugging/ |
然后返回build目录下重新编译,编译成功
执行安装
1 | # 执行安装 |
测试grpc是否安装成功
测试protoc是否安装成功
1 | protoc --version |
打印protoc版本为:3.13.0
cd至grpc/example/cpp下的helloworld文件中,进行测试
1 | cd /test/code/grpc/examples/cpp/helloworld/ |
然后创建build文件夹,对helloworld进行编译
1 | mkdir build |
编译完成后,分别执行greeter_server和greeter_client进行测试(这里得起两个终端进行测试)
1 | ./greeter_server |
服务器和客户端分别显示:


4)测试boost
进入test目录,创建一个code,并将该目录下所有test文件移除,只保留code文件,最后进入code文件
1 | mkdir code |
创建一个helloboost.cpp文件并编辑
1 | vim ./helloboost.cpp |
键盘点击‘i’,进入插入模式,粘贴,将boost版本输出
1 | #include <iostream> |
然后点击esc,输入‘:wq’保存退出文件
使用g++编译该文件,生成helloboost 执行文件
1 | g++ -o helloboost ./helloboost.cpp |
执行helloboost 文件
1 | ./helloboost |

boost版本号被成功输出,boost被成功安装
拉取我们执行写的服务器代码,并进行测试,我们直接拉取博主恋恋风辰的个人仓库
1 | git clone https://gitee.com/secondtonone1/boostasio-learn.git |
cd至networl文件夹下
1 | cd ./boostasio-learn/network/ |
选择‘day06-AsyncServer’这个代码文件,这个文件用于搭建一个最简单的异步服务器
这里首先写一个cmakelist,然后通过cmakelist生成makefile文件,再该文件下执行make生成可执行文件AsyncServer,运行即可测试。
编写makelist.txt
进入‘/test/code/boostasio-learn/network/day05-AsyncServer’目录下,输入
1 | vim ./CMakeLists.txt |
输入以下内容:
1 | cmake_minimum_required(VERSION 3.12) |
- cmake_minimum_required:表示cmake所需的最低版本为3.12;
- **project(AsyncServer)**:项目名称为AsyncServer
- **set(CMAKE_CXX_STANDARD 17)**:C++标准设置为C++17
- **set(BOOST_ROOT /usr)**:Boost库的路径为/usr
- **find_package(Boost REQUIRED COMPONENTS system thread)**:查找 Boost 库所需的组件,比如COMPONENTS ,system ,thread
- **file(GLOB SOURCES ${CMAKE_CURRENT_SOURCE_DIR}/day06-AsyncServer/*.cpp)**:将所有的cpp文件定义到一个SOURCES 变量中,这里将CMAKE_CURRENT_SOURCE_DIR(当前cmake目录下)下day06-AsyncServer 目录下所有扩展名为 .cpp 的文件添加到 SOURCES 变量中。这一步是为了添加源文件。
- add_executable(AsyncServer ${SOURCES}):添加可执行文件,使用 ${SOURCES} 中包含的所有源文件来编译并生成一个目标:AsyncServer
- 定义包含目录:为AsyncServer 目标添加头文件搜索路径,确保当 AsyncServer 编译时,这些路径中的头文件可以被找到并正确引用。PRIVATE是访问级别,它指定这些目录仅在目标 AsyncServer 的编译过程中可见,cmake支持以下三种访问级别:
- PRIVATE:仅当前目标可以访问这些目录(其他依赖于这个目标的项目无法访问)。
- PUBLIC:当前目标和依赖于这个目标的其他目标都可以访问这些目录。
- INTERFACE:仅依赖于当前目标的其他目标可以访问这些目录,但当前目标本身不能访问。
- 包含 Boost 头文件路径:为 AsyncServer 目标添加 Boost 库的头文件目录,以便在编译时能够找到并使用 Boost 库的头文件,${Boost_INCLUDE_DIRS}包含了 Boost 库头文件的路径,通常在找到 Boost 库后,CMake 会将头文件路径存储在这个变量中
- 链接 Boost 库:将 Boost 库链接到 AsyncServer 目标,使其在编译过程中能够找到并链接到 Boost 的库文件。${Boost_LIBRARIES}:这个变量包含了 CMake 找到的 Boost 库的链接路径,这个变量通常在调用 find_package(Boost REQUIRED COMPONENTS system thread) 后被定义
最后,新建目录build, 进入build目录,执行cmake ..
1 | mkdir build |

执行‘make’即可编译该项目
1 | make |

生成了‘AsyncServer’可执行文件,执行该文件即可启动服务器
1 | ./AsyncServer |
我顺便学习了如何将生成的容器生成镜像并打包成压缩文件,并在其他机器上下载使用;以及如何将容器内部的端口映射至宿主机。总结如下:
1. 如何打包容器生成tar?
为了避免在其他平台使用该代码需要重复配置容器环境,这里学习如何将配置好的docker容器打包生成压缩文件tar。
a. 生成容器镜像
首先,将容器生成镜像,如果创建了并启动一个容器后,必须将其保存为新的镜像,不然该容器不会显示在镜像列表中,输入“sudo docker images”不会看见该镜像,只有输入“sudo docker ps”才能看见正在运行的容器。所以如果想将配置好的容器生成为镜像,必须输入下面的内容:
1 | sudo docker commit cppubuntu cppubuntu:1.0 |
b. 将镜像压缩成tar
1 | sudo docker save -o cppubuntu.tar cppubuntu:1.0 |
将cppubuntu.tar保存下来,该文件可以传输到其他机器或系统中使用。
在其他机器上使用 docker load 命令来加载这个镜像:
1 | sudo docker load -i cppubuntu.tar |
加载后,可以使用 docker images 查看是否成功导入镜像,然后像平常一样通过 docker run 命令启动容器。
1 | sudo docker images |
然后输入以下命令即可运行该容器:
1 | sudo docker run -itd --name testubuntu cppubuntu:1.0 |
如果提示容器名称 testubuntu 已经被一个现有的容器使用,但是sudo docker ps中没有,那么可以使用
1 | sudo docker ps -a |
查看所有容器,包括停止的。然后使用下面的代码处理停止的容器:
1 | // 处理1 |
如果名称没有被重复使用,且想进入这个容器,输入以下内容:
1 | sudo docker ps |
第一行命令将列出所有正在运行的容器及其信息
第二行命令进入指定容器,**-it** 参数用于交互式终端,**/bin/bash** 表示想要使用的 shell, testubuntu 是在运行该容器时为其指定的名称“sudo docker run -itd –name testubuntu cppubuntu:1.0”
最后,可以使用exit命令退出容器
1 | exit |
2. 如何将容器内部的端口映射至宿主机?
因为容器的ip和宿主机的ip不同,容器的ip随时都可能会发生变变化,在这种情况下需要将容器内部的一个断开抛出去,这样启动容器的时候将该端口带上,就会映射成宿主机的一个端口,那么外部的客户端访问宿主机的该端口就会进入至容器内部访问到AsyncServer。比如:
a. 使用 -p 选项启动容器并映射端口
当启动容器时,使用 -p 参数来映射宿主机和容器的端口。假设 AsyncServer 在容器内监听 8080 端口,可以这样启动容器:
1 | docker run -d -p 8080:8080 cppubuntu |
- -d:以后台模式启动容器
- -p 8080:8080:将宿主机的 8080 端口映射到容器内的 8080 端口。这样外部客户端访问宿主机的 8080 端口时,会被转发到容器内部的 8080 端口
b. 验证端口映射
启动容器后,可以通过 docker ps 查看运行中的容器及其端口映射情况:
1 | docker ps |
输出示例:
1 | CONTAINER ID IMAGE COMMAND CREATED STATUS PORTS NAMES |
这里可以看到宿主机的 8080 端口已经成功映射到容器的 8080 端口。
c. 在外部客户端访问服务
现在外部的客户端可以通过访问宿主机的 IP 地址和端口号 8080 来访问容器内部的 AsyncServer 服务。例如:
1 | http://宿主机IP:8080 |
这样,无论容器的 IP 如何变化,外部都可以通过宿主机的端口来稳定地访问容器内部的服务。