二十四、day24
我们在前文通过beast实现了http服务器的简单搭建,但是有很多问题我们并没有解决。
在前文中,我们的 get 请求不带任何参数,那如果我们想要实现带参数的 get 请求,我们应该如何做?首先应考虑实现 url 的解析函数,解析 get 请求携带的参数。
1. char 转为16进制
1
2
3
| unsigned char ToHex(unsigned char x) {
return x > 9 ? x + 55 : x + 48;
}
|
该函数用于将 4 位无符号整数(取值范围为 0 到 15)转换为十六进制字符(0到9 和 A到F),超过这个范围的值不属于十六进制的规范。
- 如果
x > 9,说明它是 10 到 15 之间的值,对应十六进制的 A 到 F。此时,x + 55 将其转换为对应的 ASCII 字符。
- 如果
x <= 9,说明它是 0 到 9 之间的值,对应十六进制的 0 到 9。此时,x + 48 将其转换为对应的 ASCII 字符。
举例:
1
2
3
4
5
6
| int main() {
for (int i = 0; i <= 15; ++i) {
std::cout << "ToHex(" << i << ") = " << ToHex(i) << std::endl;
}
return 0;
}
|
输出:
1
2
3
4
5
6
7
8
9
10
11
12
13
14
15
16
| ToHex(0) = 0
ToHex(1) = 1
ToHex(2) = 2
ToHex(3) = 3
ToHex(4) = 4
ToHex(5) = 5
ToHex(6) = 6
ToHex(7) = 7
ToHex(8) = 8
ToHex(9) = 9
ToHex(10) = A
ToHex(11) = B
ToHex(12) = C
ToHex(13) = D
ToHex(14) = E
ToHex(15) = F
|
2. 16进制转为 char
1
2
3
4
5
6
7
8
| unsigned char FromHex(unsigned char x) {
unsigned char y;
if (x >= 'A' && x <= 'Z') y = x - 'A' + 10;
else if (x >= 'a' && x <= 'z') y = x - 'a' + 10;
else if (x >= '0' && x <= '9') y = x - '0';
else assert(0);
return y;
}
|
该函数用于将一个 十六进制字符 转换为其对应的 4 位无符号整数值,支持处理大写字母(A-Z)、小写字母(a-z)和数字(0-9)
3. URL 编码函数
至于为什么需要上面两个函数实现十六进制和十进制的互转,得益于下面这个函数。
1
2
3
4
5
6
7
8
9
10
11
12
13
14
15
16
17
18
19
20
21
22
23
| std::string UrlEncode(const std::string& str) {
std::string strTemp = "";
size_t length = str.length();
for (size_t i = 0; i < length; i++) {
if (isalnum((unsigned char)str[i]) ||
(str[i] == '-') || (str[i] == '_') ||
(str[i] == '.') || (str[i] == '~')) {
strTemp += str[i];
}
else if (str[i] == ' ') {
strTemp += "+";
}
else {
strTemp += '%';
strTemp += ToHex((unsigned char)str[i] >> 4);
strTemp += ToHex((unsigned char)str[i] & 0x0F);
}
}
return strTemp;
}
|
该函数对输入的字符串进行 URL 编码(也称为百分比编码),确保字符串可以在 URL 中安全传输。URL 编码会将特殊字符转换为 % 后跟两个十六进制字符的形式。
编码规则
- 无需编码的字符:
- 字母(
A-Z,a-z)、数字(0-9)。
- 安全字符:
-、_、.、~(根据 RFC 3986 标准)。
- 空格处理:
- 空格被替换为
+(符合 application/x-www-form-urlencoded 格式,常见于表单提交)。
- 需要编码的字符:
- 其他所有字符(如
!、#、$、%、&、= 等)会被转换为 % 后跟两个十六进制字符。
- 例如,字符
@ 的 ASCII 码是 0x40,会被编码为 %40。
举例:
假设输入字符串为 "Hello World!@#",编码过程如下:
'H'、'e'、'l'、'l'、'o':无需编码。' '(空格):替换为 +。'W'、'o'、'r'、'l'、'd':无需编码。'!':ASCII 码为 0x21,编码为 %21。'@':ASCII 码为 0x40,编码为 %40。'#':ASCII 码为 0x23,编码为 %23。
最终编码结果:
"Hello+World%21%40%23"
百分比编码:
- 使用
ToHex 函数将字符的高 4 位和低 4 位转换为十六进制字符。
- 例如,字符
'#'(ASCII 码 0x23)的转换:
- 高 4 位:
0x2 → '2'(ToHex(0x2) = '2')。
- 低 4 位:
0x3 → '3'(ToHex(0x3) = '3')。
- 结果:
%23。
- 同理,汉字的编码过程同样如此
严格遵循 URL 编码标准(RFC 3986)时,空格应编码为 %20,而非 +。+ 是 application/x-www-form-urlencoded 的约定。若需兼容 RFC 3986,可将 str[i] == ' ' 分支改为 strTemp += "%20"
4. URL 解码函数
1
2
3
4
5
6
7
8
9
10
11
12
13
14
15
16
17
18
19
20
21
| std::string UrlDecode(const std::string& str)
{
std::string strTemp = "";
size_t length = str.length();
for (size_t i = 0; i < length; i++)
{
if (str[i] == '+') strTemp += ' ';
else if (str[i] == '%')
{
assert(i + 2 < length);
unsigned char high = FromHex((unsigned char)str[++i]);
unsigned char low = FromHex((unsigned char)str[++i]);
strTemp += high * 16 + low;
}
else strTemp += str[i];
}
return strTemp;
}
|
该函数对 URL 编码的字符串进行解码,将其还原为原始字符串。
5. 实现 get 请求参数的解析
参考网络编程(21)——通过beast库快速实现http服务器 | 爱吃土豆的个人博客,我们在 HttpConnection 类中新添加两个私有成员:
1
2
| std::string _get_url;
std::unordered_map<std::string, std::string> _get_params;
|
因为 URL 中 GET 请求的参数是通过查询字符串表示的,查询字符串附加在 URL 的末尾,用于向服务器传递键值对形式的参数,格式如下:
1
| ?key1=value1&key2=value2&key3=value3
|
- **
?**:表示查询字符串的开始。
- **
key=value**:参数以键值对的形式表示。
- **
&**:用于分隔多个键值对。
举例:
假设有一个 URL:
- 查询字符串:
?q=hello+world&lang=en%2Fus&page=2
- 参数:
q=hello worldlang=en/uspage=2
并定义函数 PreParseGetParam用于对查询字符串进行编解码:
1
2
3
4
5
6
7
8
9
10
11
12
13
14
15
16
17
18
19
20
21
22
23
24
25
26
27
28
29
30
31
32
33
34
35
36
| void HttpConnection::PreParseGetParam() {
auto uri = _request.target();
auto query_pos = uri.find('?');
if (query_pos == std::string::npos) {
_get_url = uri;
return;
}
_get_url = uri.substr(0, query_pos);
std::string query_string = uri.substr(query_pos + 1);
std::string key;
std::string value;
size_t pos = 0;
while ((pos = query_string.find('&')) != std::string::npos) {
auto pair = query_string.substr(0, pos);
size_t eq_pos = pair.find('=');
if (eq_pos != std::string::npos) {
key = UrlDecode(pair.substr(0, eq_pos));
value = UrlDecode(pair.substr(eq_pos + 1));
_get_params[key] = value;
}
query_string.erase(0, pos + 1);
}
if (!query_string.empty()) {
size_t eq_pos = query_string.find('=');
if (eq_pos != std::string::npos) {
key = UrlDecode(query_string.substr(0, eq_pos));
value = UrlDecode(query_string.substr(eq_pos + 1));
_get_params[key] = value;
}
}
}
|
然后在函数 process_request 中的 get 部分添加:
1
2
3
4
5
6
| void process_request() {
case http::verb::get:
PreParseGetParam();
}
|
然后在 create_response 函数中添加如下代码:
1
2
3
4
5
6
7
8
9
10
11
12
13
14
15
| void create_response() {
else {
_response.result(http::status::not_found);
_response.set(http::field::content_type, "text/plain");
beast::ostream(_response.body()) << "File not found\r\n";
}
int i = 0;
for (auto& elem : _get_params) {
i++;
beast::ostream(connection->_response.body()) << "param " << i << "key is " << elem.first;
beast::ostream(connection->_response.body()) << "param " << i << "value is " << elem.second << std::endl;
}
}
|
用于显示获取的参数.
6. 测试
浏览器地址栏中输入:localhost:1250/get_test?key1=value1&key2=value2
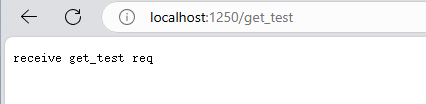
浏览器显示如下结果:

不带参数的结果为: